IMPORTANT TAKE-AWAYS
There are a couple important things to know when you lay out your pattern. You will want to maximize your fabric usage (follow the recommended pattern layout below), as well as lay your pattern pieces on grain. These instructions are based on fabric folded in half, selvages pinned together. *Sewing selvages together also works too!
MAXIMIZE FABRIC USAGE
Your pattern will give you a guide to lay out your fabric optimizing your fabric. This will help you . The tricky part is, fabric comes in a multitude of different widths on the crosswise grain, so sometimes you will need to play around with alternative pattern layouts. Below is an example of the "Simple Box Top" pattern layout provided in the Simple Box Top Pattern.
FABRIC FOLDED OR FLAT?
Often Patterns will be cut out on a folded layer of fabric for the convenience of cutting mirror image pieces. as well as decreasing the total surface area needed to layout your fabric. When you read your pattern make sure to determine if it is intended to be placed on the fold. Sometimes it is recommended to cut out your pattern pieces on a flat piece of fabric (this depends on pattern type/optimum layout). If you cut out your pattern on a flat piece of fabric, make sure to cut out mirror images of sleeves/bodices/pant legs (by simply flipping over the pattern piece) if your fabric has a face (print on one side).

PLACE PATTERN PIECES ON GRAIN
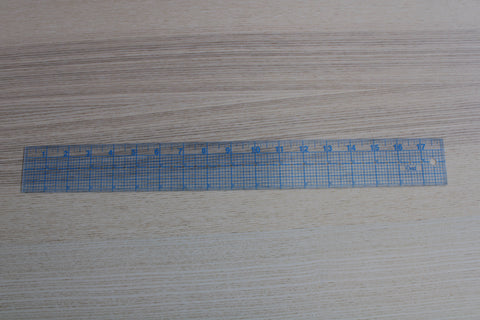
When you lay out your pattern it is very important that you lay it on your fabric "on grain". The most helpful tool you can use to do this is a clear ruler:
Pin your selvages together, and orient the folded fabric along the 90 degree angle of a table edge. This is a quick way to make sure the fibers are running perpendicular to one another. If you notice there are ripples on your folded egde/this step seemed oddly difficult, your fabric may be a little warped (fibers not oriented 90 degrees to one another) and may need to be blocked. This is due to how fabric is stored on a bolt and gravity's affect on the fibers.

Roughly lay out ALL of your fabric pieces to make sure they all fit before you secure/cut pattern pieces. This will save you time and future headaches.
When you lay down your pattern pieces the most important take away from this tutorial is you want to orient the grainline indicated on the pattern piece parallel to the selvage or "lengthwise grain" of your fabric. You must do this by measuring the distance from the grainline to your selvage at multiple points (ends and middle points of line). If you eyeball this it is more than likely it will be off grain and your garment may end up hanging a bit crooked or twisting.

Pattern pieces that indicate "place on fold" must be placed on the folded edge of the fabric. This piece is convenient because your fold will be already parallel be to your selvage so this step does not really require measuring. Just make sure your fold is perfectly on the edge of your pattern piece so that you do not add or remove fabric (especially to a neckline) and change your pattern dimensions. This is particularly important for patterns with collars.

*Please note you may either fold your fabric in half by pinning selvages together, or lay fabric completely flat. This is a personal preference decision. Folding in half is more beginner friendly as it will yield complete pattern pieces using the fold of the fabric and create mirror images of pieces that need two pieces (for instance a left and right sleeve, or left and right bodice). Mirror images are most important when your fabric has a face or print only on one side.